Our team has developed this guide while actively working on new projects and exploring the potential of various AI-based speech transcription services. Our main objective was to integrate live transcription of meetings and transcription of past recorded meetings, whether locally downloaded or accessed via a link, into one of our applications. Essential functionalities included multi-language subtitle support and compatibility with different subtitle file formats.
Additionally, for another project, our primary goal was to establish a workflow that could decode audio dialogue recordings and subsequently process the text data according to a specific algorithm.
Today, in this third part of the cycle of articles, we will retell about one of the popular services for speech transcription — the “Speech-to-Text” by Microsoft Azure. This blog post will present you one of the ways to get your first transcription and try how AI services work with transcribing.
Short plan, what we will do to translate audio into text with “Speech-to-Text” by Microsoft Azure:
- Log in to Microsoft Azure: should you already possess a Microsoft Azure account, simply sign in with your existing information. However, if you don’t have one yet, it is necessary to establish a new Microsoft Azure account.
- Сreate new Speech Service: create speech services and all related needed items.
- Create transcription: adjust settings and prepare file for transcription.
Let’s start!
Logging in to Microsoft Azure
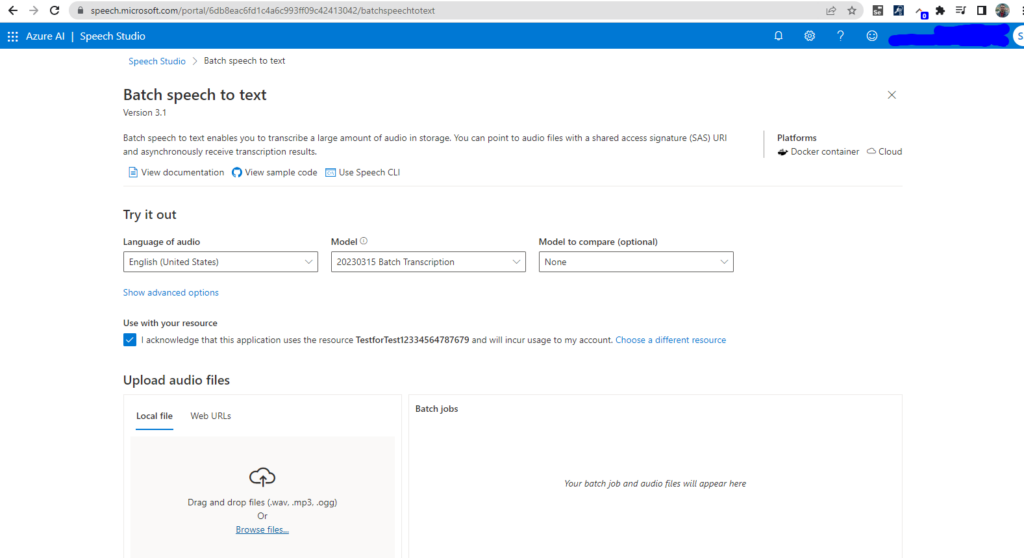
- Navigate to Batch speech to text part of Microsoft Azure AI.
Free trial version for unregistered users has some limits is 5 audio files per batch job and 1 minute per audio file.
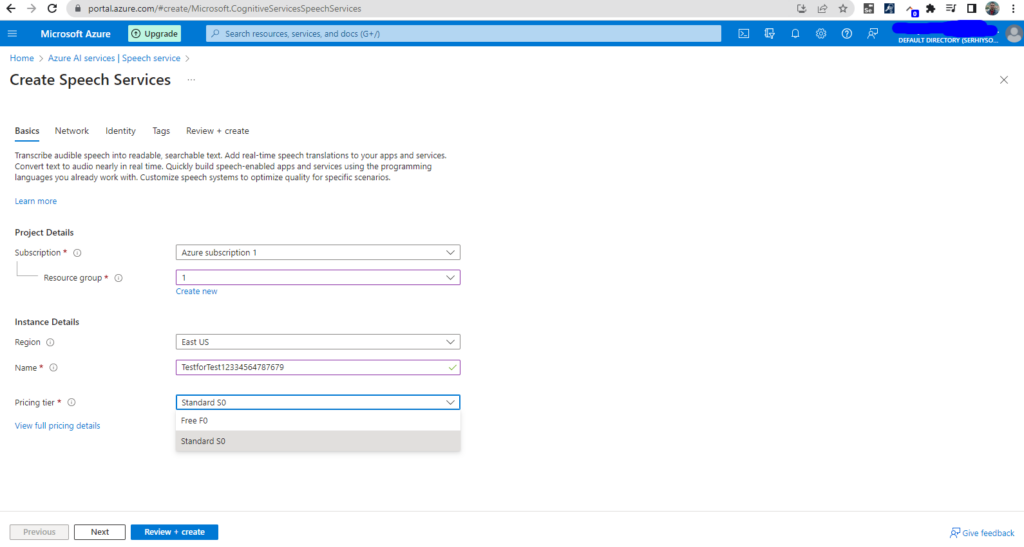
That’s why for more opportunities (even for tests) you need to sign up and use (select) the Standard tier instead of the Free (F0) tier. More about the issue between these tiers you can find here, more about all tiers — here.
Сreating new Speech Service
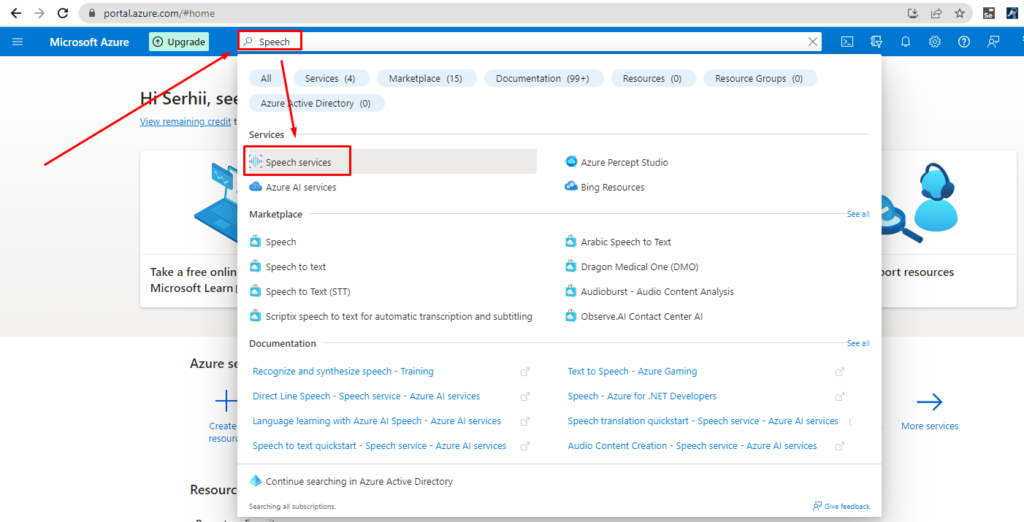
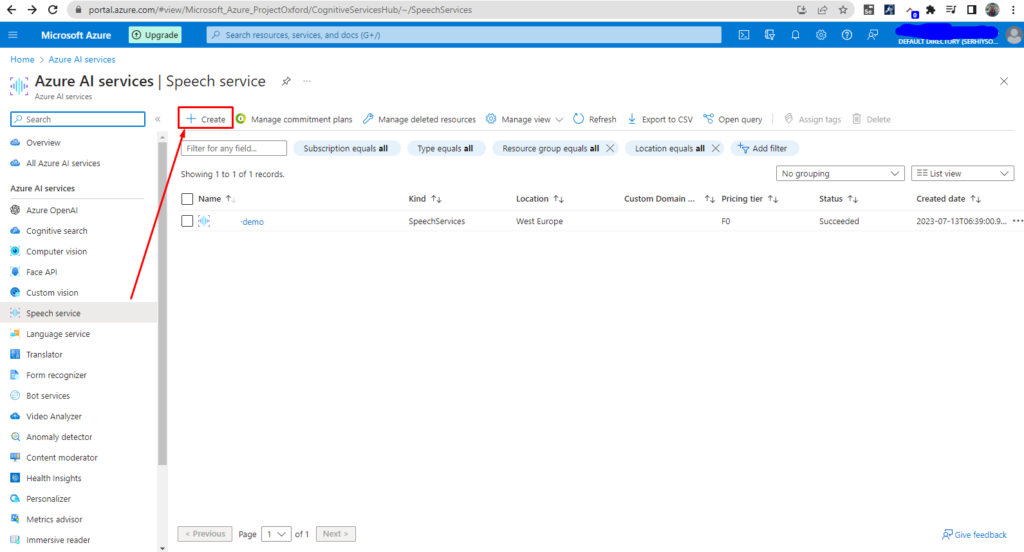
- Go to the Azure portal, find “Speech services” and click it. A “Speech services” page opens.
- Click the “Create” button. A “Create speech services” page opens.
- Fill in all necessary fields and click “Next”.
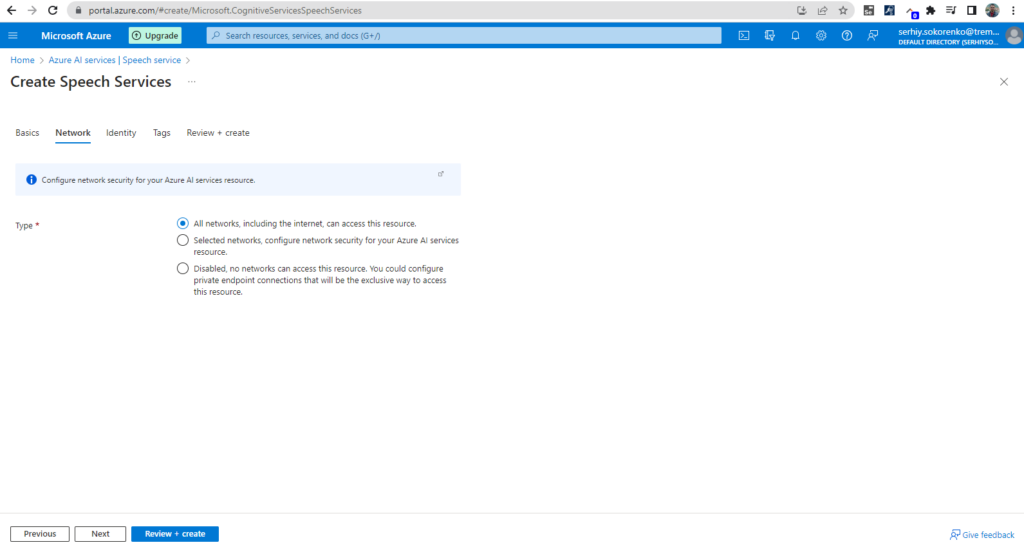
 5. Then you can check all tabs with settings or you can use default settings and click “Review and create”.
6. Click the “Create” button.
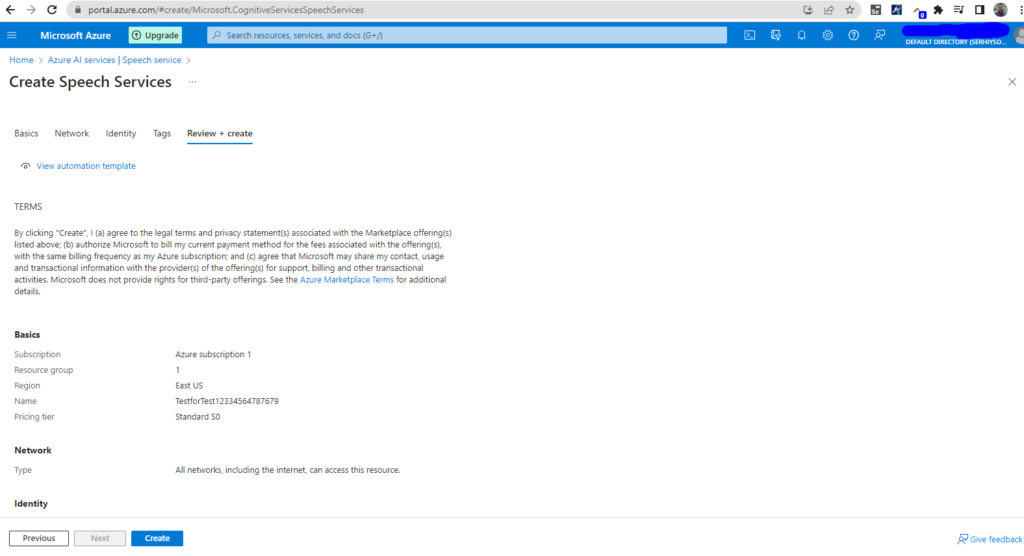
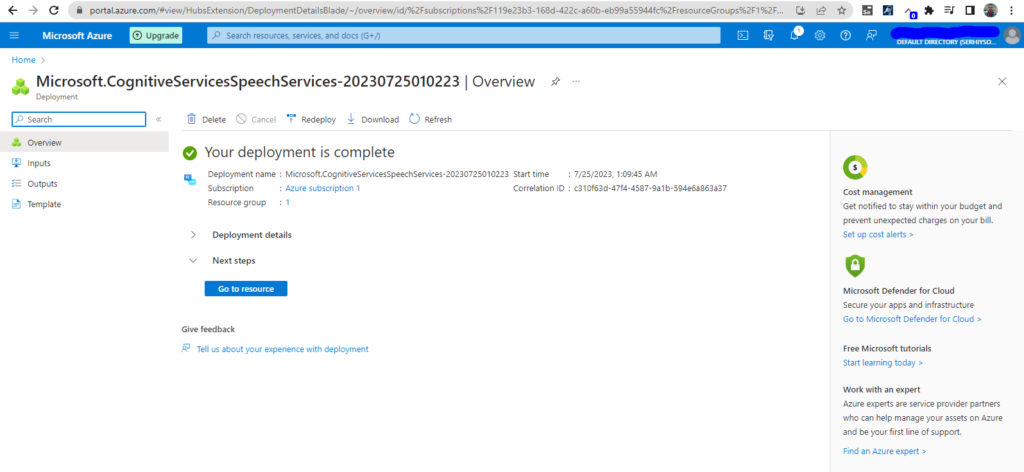
You will receive the result message “Your deployment is complete” and click “Go to resource”.
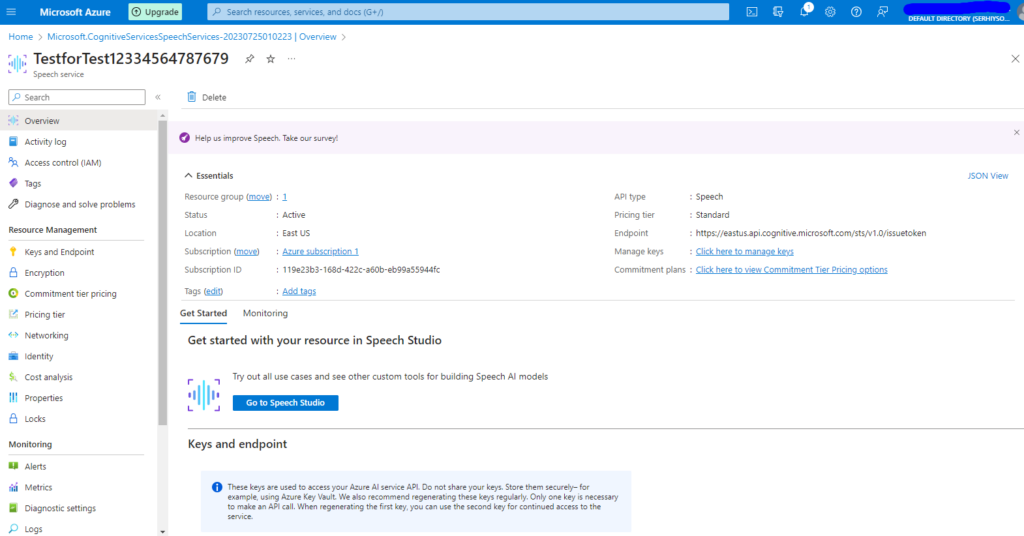
On this page, you can adjust your resource for the next usage.
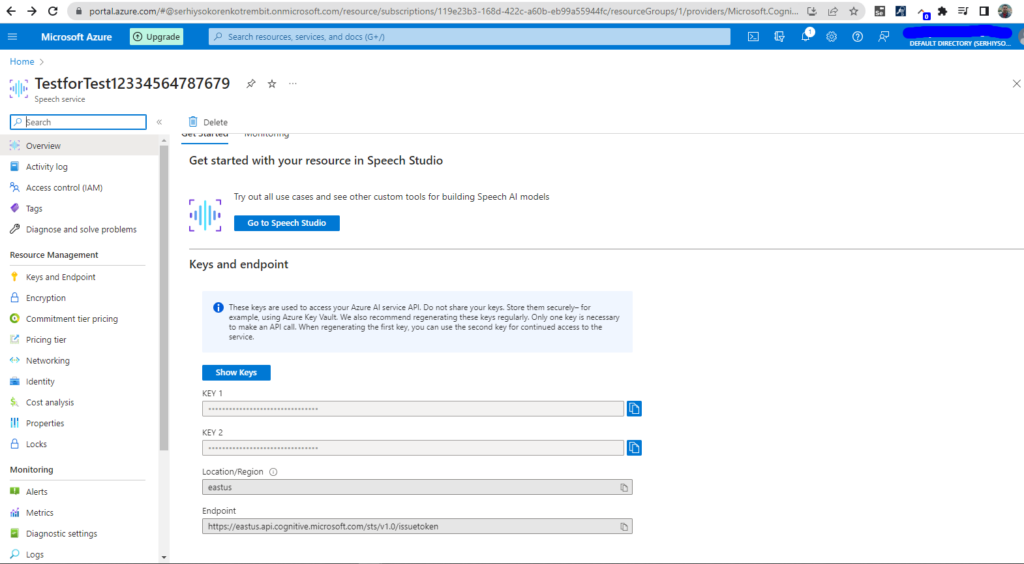
Also, on this page you can copy and use API keys for your application in future.
Creating transcription
- Go to Speech Studio and click “Batch speech to text”. A “Batch speech to text” page opens.
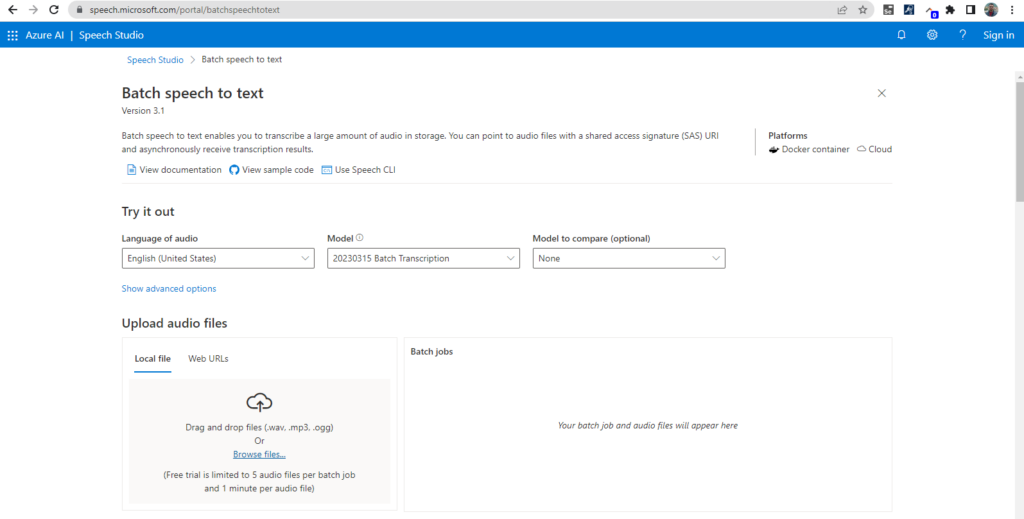
- Choose transcription language and model; choose file for transcription. Now the transcription will start.
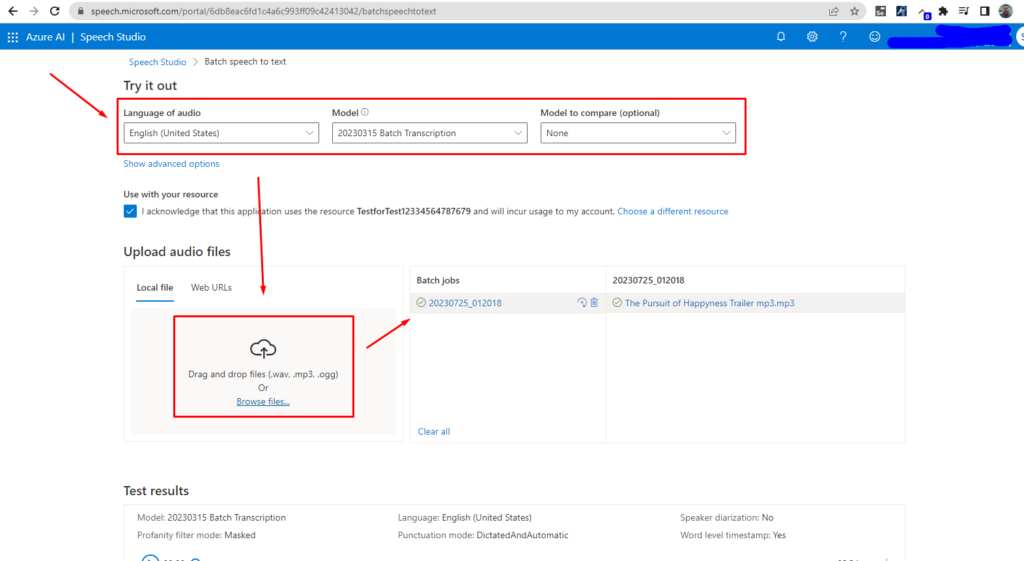
After transcription finishes, all the text from the audio file appears. And, additionally, you can listen to all the files to check the correctness of transcription.
Conclusion
We’ve delved into the most prevalent and simple application of “Speech-to-Text” by Microsoft Azure to give you a fundamental understanding. In upcoming articles, we plan to introduce you to other effective strategies in this domain, such as Whisper from OpenAI, AWS Transcribe by Amazon and Google Transcribe. If you need a more complex solution for integrating with your existing or future applications, feel free to contact us for detailed information and services.